In this guide we are going to take a look at how to set up your email account with your Windows mobile phone.
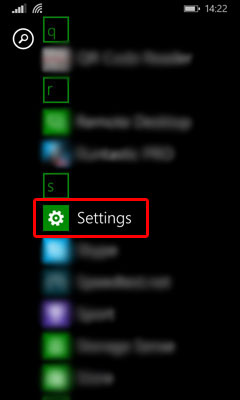
1. Swipe from the right hand side of the screen in order to open up the list of Applications on your phone. Scroll down and select the Settings option.
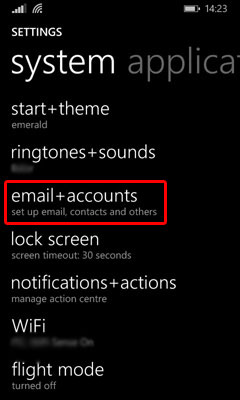
2. Under the System tab, select the email accounts option.
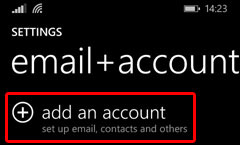
3. Select the add an account option within the email accounts page.
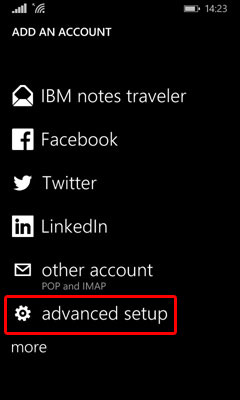
4. Scroll down to the bottom of the list until you get to Advanced Setup. Select the Advanced Setup option.
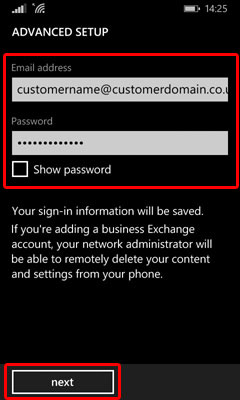
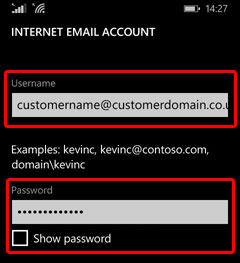
5. Input your email address, replacing the words customername@customerdomain.co.uk with your email address, and also put in the password for your email account. In order to check you have entered the correct password you can click the Show Password button. Click on Next once this has been entered.
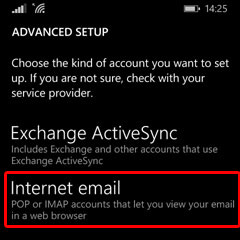
6. On the next screen select the Internet Email option. You will then need to fill out more information on the following page.
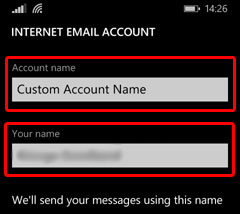
7. Set the Account Name to be something you can identify the account by, for example you may use 'customerdomain.co.uk Emails'. Add your name into the 'Your Name' field as this will be shown when you send emails to customers.
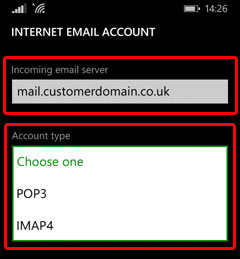
8. Scroll further down the page and you now need to input mail server settings. To start off you want to put in the Incoming Mail Server which is generally mail.customerdomain.co.uk, replacing customerdomain.co.uk with your own domain name. You also need to choose whether you want to set this up as an IMAP or POP3 account.
9. Scroll further down the page and you will now need to input your login details for the email account. Put in both your Username and Password that you use to access your email account.
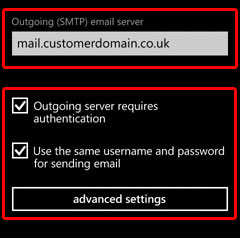
10. Scroll further down the page and you will need to put in the outgoing mail server. This is mail.customerdomain.co.uk, replacing customerdomain.co.uk with your domain name. You also want to make sure the 'Outgoing server requires authentication' and the 'Use the same Username and Password for sending mail' boxes are ticked.
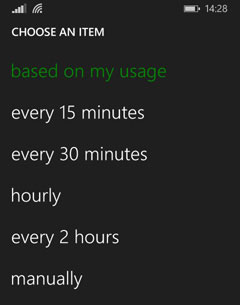
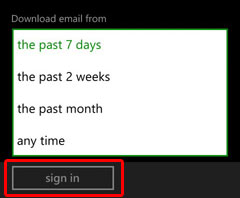
11. Under the Outgoing Mail server settings select the 'Advanced Settings' option. In here you can set how often you want your phone to check for emails and also how many emails you wish to download to your phone. These settings are down to personal preference and also based on your usage of your email account. Once you have selected your preferred options click on the Sign In button.
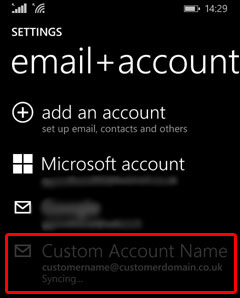
12. When you have selected the Sign In option you will be taken back to you email+accounts page where you will see any other accounts you have setup as well as the greyed out version of the account you have just added. This means your phone is currently syncing with our mail server and is pulling down your emails.
You have now successfully added your email account to your Windows Phone.
Testing:
In order to see the most recent emails that have been sent to you, you can swipe down from the top of your screen where it will show you a list of your unread mail.
Additionally you will also find that you have had a new icon placed on your home screen which will have the name of the email account you have just added.
And if you click on this icon it will open up your mailbox for you.
