Guide to setup an IMAP account on Mac Mail (OS version 10.6.8)
This guide will help you in setting up your email in an IMAP configuration for Mac Mail
1. When you first open Mac Mail you will see this screen, please type:
Full Name: Email Address
Email Address: customername@customerdomain.co.uk
Password: Customer mailbox password
NOTE: make sure you enter YOUR email address and password, the one we provided is just for demonstration purposes.
Then press “Continue”

2. Mac Mail will immediately begin searching for the mail server that your mailbox is on, you must click “Cancel” and then ”Continue” as it will not be able to find the mail server because we need to put the details manually in the following steps.

3. Here you must put in the information for the Incoming Mail Server.
From the drop down menu select “IMAP”
Description: customername@customerdomain.co.uk
Incoming mail server: mail.customerdomain.co.uk (EG mail.google.co.uk if your domain was google.co.uk)
User Name: customername@customerdomain.co.uk
Password: Password for mailbox
After you have entered all the details press “Continue”

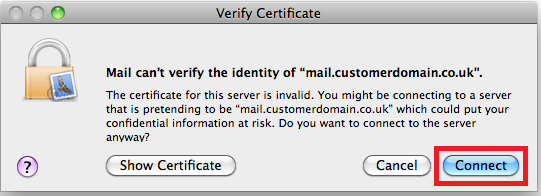
4. Click connect
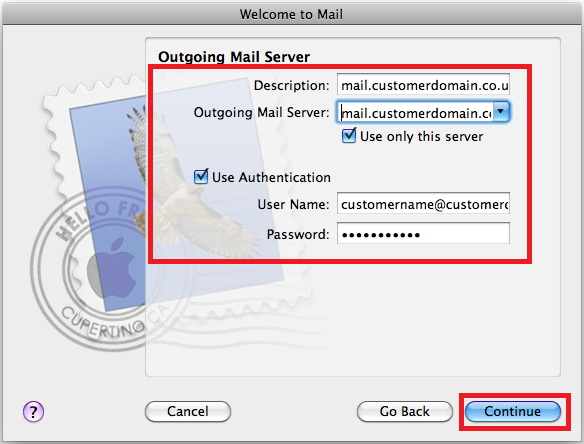
5. Enter information for the outgoing mail server.
Description: mail.customerdomain.co.uk
Outgoing mail server: mail.customerdomain.co.uk
Tick “Use only this server”
Tick “Use authentication”
User name: customername@customerdomain.co.uk
Password: Mailbox password
After you have entered all the information press “Continue”
6. Make sure “Take account online” is ticked and press create

7. Now we need to disable SSL as you can see in the previous step is currently on at this point.
Go to “Mail” and down to “Preferences”

8. In the window that opens, make sure you are in “Accounts” and then go to the “Advanced” tab
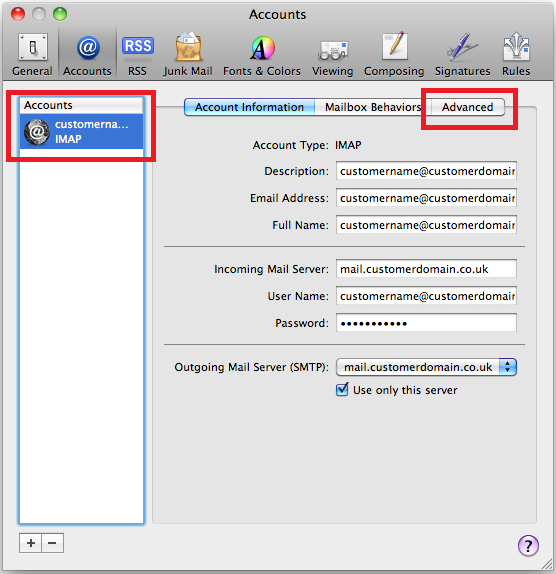
9. Here you need to make sure the box next to “Use SSL” is unchecked and that the port is 143.
After you have made this change click the red circle with an X in it to close the window in the top left.

10. Click “Save”

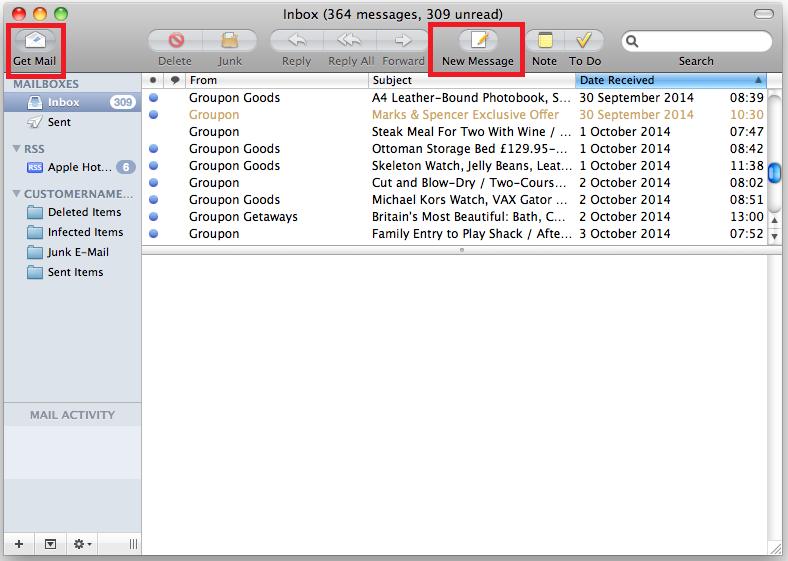
11. If your email has not started downloading from the server at this point click “Get Mail” in the top left.
You have now set up your Mac Mail with an IMAP account!
